

How To Install A Cement Patio
It's easy to pour and build a backyard patio made of concrete in this How To article. On a small calibration, concrete is fairly easy to work with, merely installing an entire patio tin can be a challenge. It is possible to build an attractive concrete patio yourself, only careful planning and training is necessary. Exist sure to place all the concrete at once; a big patio tin can be broken down into smaller manageable sections using 2x4's.
Once concrete is in place, yous're stuck with it forever; replacement is costly and difficult. Planning is essential for a perfect DIY conrete patio.
Build and install forms, making sure they're level and properly graded for drainage. To prevent rain puddles from forming, design a 2% gradient (every x' long volition drop ii.5"). Place and level a 4"-6" bed of gravel; you need a gravel base of operations in areas of poor drainage or freezing temperatures. Be certain to compact the gravel base and rent a compacting auto if necessary.
Check gravel thickness with a homemade template that extends downwards from the tops of the forms 4" of the finished patio; when information technology merely touches the meridian of the gravel, the base is thick enough. A taller slab will exist stronger- nosotros recommend 4" thick. Let the gravel extend under the edges of the forms.
If the patio will adjoin an existing concrete patio or slab, install isolation-articulation strips. Attach the strips flush with the height of an existing slab using hardened concrete nails or construction adhesive.

How To Pour a Concrete Slab
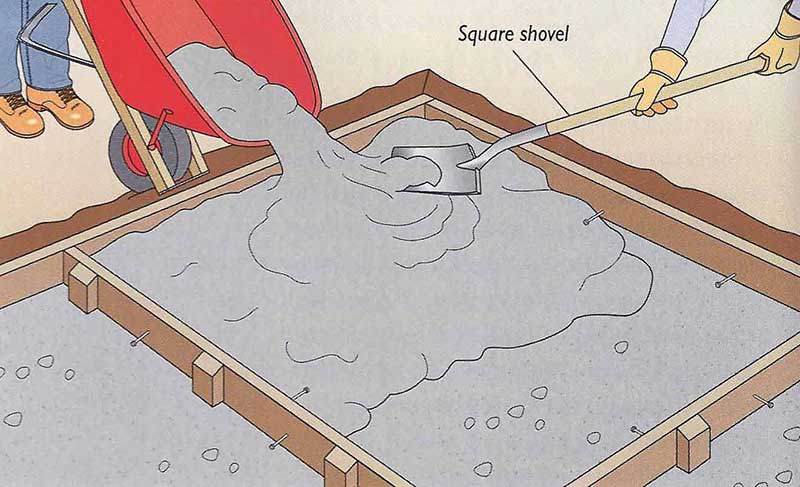
Thoroughly dampen the gravel. Start placing the concrete at 1 corner of the form while a helper uses a shovel or hoe to spread it (in a higher place).
Pour the concrete upward against the form and compact information technology into all corners with a square shovel or mortar hoe; with a hoe, button- don't drag the physical. But don't overwork the concrete, and don't spread it also far; overworking will forcefulness the heavy aggregate to the lesser of the slab and will bring up small-scale particles that can cause defects in the finished DIY concrete patio. Instead, space out your placement along the form, placing each batch against the previous batch to fill the course.
If you program to leave the dividers in place, finish, and cure the concrete in alternate sections. (Imagine information technology similar a checkerboard and do all the red squares first.) In one case they've cured for at least three days, remove the stakes from inside of the remaining sections (black squares) and consummate them.
Hitting the DIY concrete patio
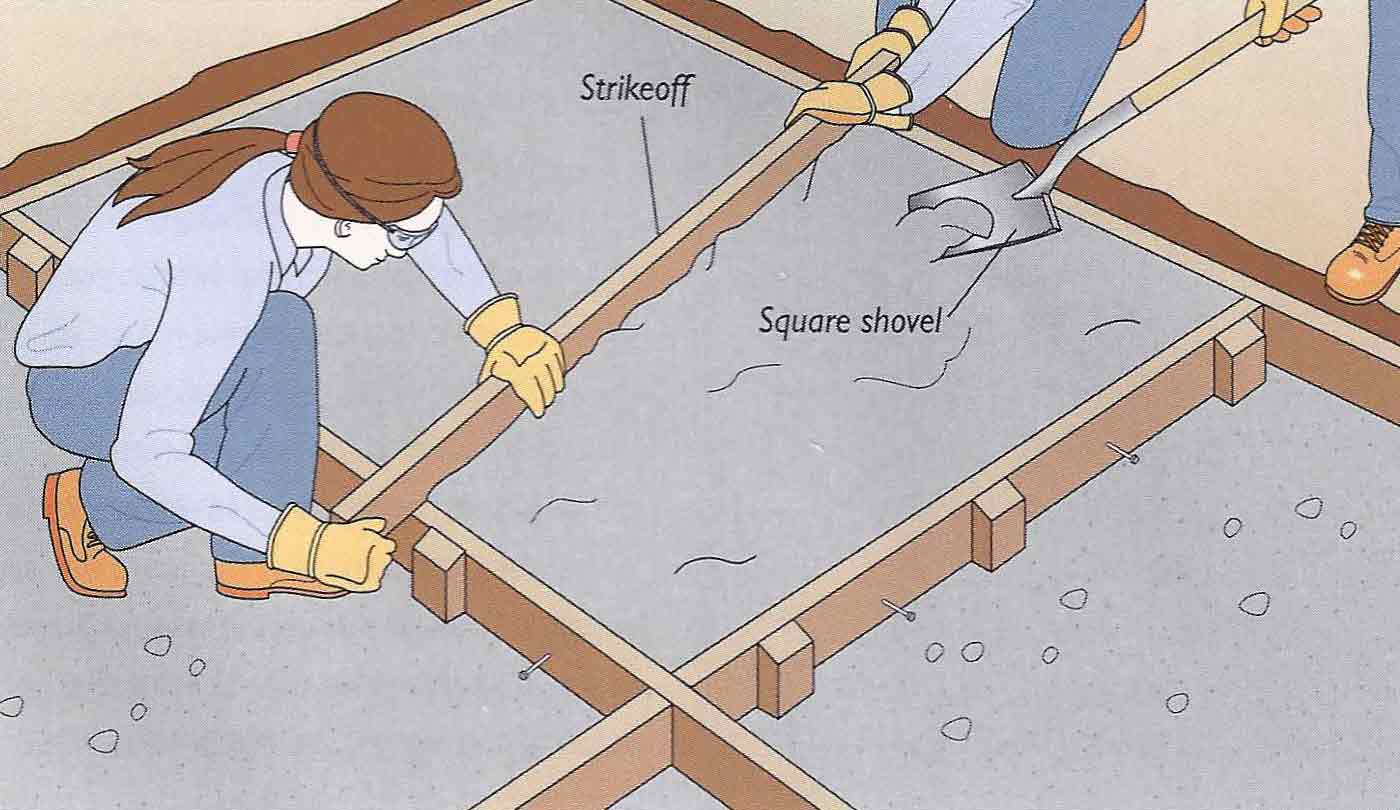
Move a strikeoff (example in a higher place- a straight wood 2x4) beyond the class to level the concrete. On big jobs, do this batch-by-batch, rather than afterward all the cement is placed. Motility the board slowly along the form, using a side-to-side, sawing motion; be sure to make two passes. Fifty-fifty on narrow forms, two people will make the piece of work faster and more efficient. If necessary, a third person can shovel extra concrete into any corners to save time.
Smoothing concrete patio surface
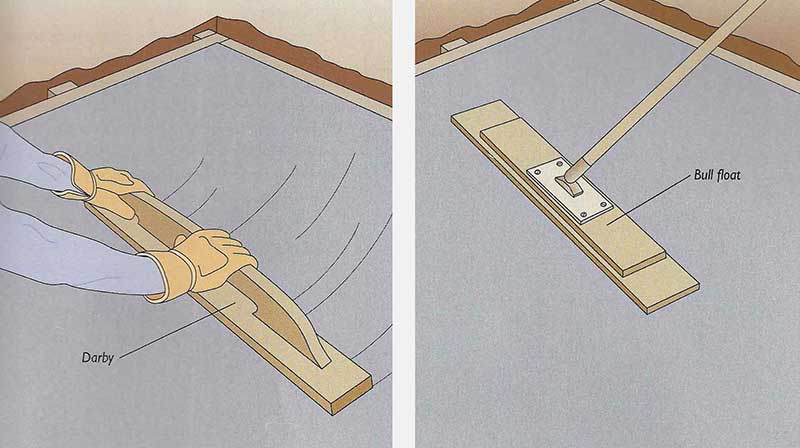
If you're working on a very small walkway leading to your patio, you tin can skip this step.) Afterwards striking off, use a darby or bull float-depending on the size of your project-for the initial finishing, to smooth down loftier spots and make full small hollows left after striking off.
Use the darby (above, left) on pocket-sized DIY concrete projects. Motion it in overlapping arcs, so repeat with overlapping straight, side-to-side strokes. Keep the tool flat, don't let information technology dig in. For larger jobs, use a balderdash bladder (above, right). Push button it away from you with its leading edge raised slightly. Pull it dorsum nearly apartment; overlap your passes.

Edging concrete
Giving your Do It Yourself concrete slab or sidewalk a curved border volition help it resist chipping and foreclose stub-toes or tripping accidents. To edge the cement, begin past running a mason'due south trowel betwixt the concrete and the outer edges of the slab form (above-inset). Follow with an edger (above-right) . Run it back and forth to smooth and compact the concrete. Unless the tool has a toboggan end, heighten the leading edge slightly every bit you motion it.
Jointing concrete for controlled cracks
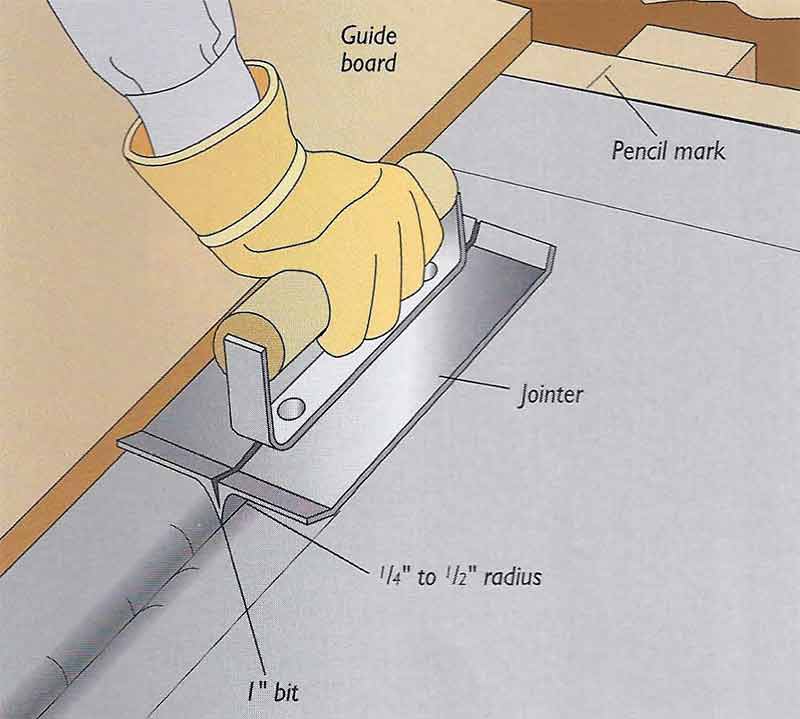
Big slabs of physical volition crevice. To command patio cracks you demand to set joints with a ane" deep jointer with a straight guide lath to make command joints (higher up). Kneel on a board to reach the eye of a wide slab. Depth of command joints should exist one-quarter of the slab's thickness. Control joints can exist fabricated at intervals of about 1.5 times the width of the slab merely the altitude between them should not exceed thirty times the thickness of the patio- x' for a four" thick slab.
For concrete made with 3/four" coarse aggregate, reduce the maximum control articulation spacing to 8' for a iv" slab. Jointed sections should never exist more than than 1.5 times as long as they are wide. BONUS TIP: It is better to have more than joints, rather than less to prevent cracking.
Measure along the forms to locate the articulation and mark them with a pencil. Any edging or jointing marks can be removed by floating- which is next!
 Floating and troweling physical
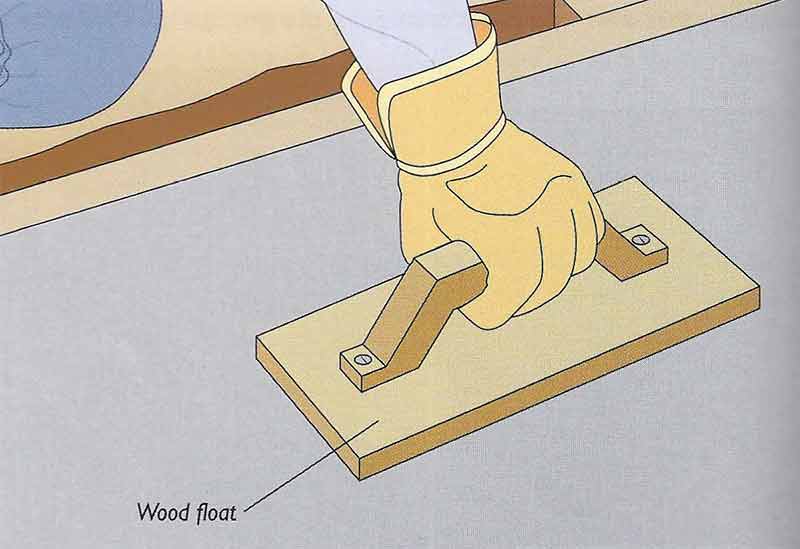
Now comes the fun role of working with prepare mix cement, (well, we think floating physical is fun.) After the h2o sheen has disappeared from the concrete, only before the surface has become actually stiff, bladder with a woods float or a magnesium hand bladder. The latter gives a smoother surface.
With air-entrained concrete, (what nosotros deliver) apply a magnesium float- a wood bladder can tear the patio surface. With both types of float, hold the tool flat on the surface. In one case again, to achieve the middle of a large slab, kneel on boards and then finish over the board marks as y'all work backwards.
CAUTION: Don't employ a steel trowel on outdoor surfaces, unless you are going to broom-stop afterwards; it creates a very slick surface that tin be dangerous when wet. And so positively do not employ a steel trowel on a patio next to a pool.

Drying Physical: curing the DIY patio
Patio slabs need to exist moist cured to go on their surfaces from drying likewise speedily- peculiarly in our high desert heat of Twin Falls, ID. If the surface dries also before long, information technology volition be weak and may later get powdery or crumble away. Cure your concrete past keeping it moisture. Cover the slab with burlap, sand, straw, or other material and wet it (above). Wet it down every bit needed until curing is finished.
Another option is to use plastic sheeting (inset above) or a commercial curing compound. H2o evaporating from the slab will exist trapped, eliminating the demand for wetting.
Whatever method you cull, curing should last a minimum of iii days-longer in common cold weather- but it's best to let the slab cure for a week, but to be on the safe side. Don't walk on it for at least three-4 days, nor drive a vehicle until 10 days have passed.
Now it'due south time to enjoy your new DIY cement patio!
Demand More Help? Cheque back to our site as we will exist calculation the best "how-to'southward" on concrete, and articles for do information technology your-selfers.

Source: https://www.twinfallsconcrete.com/how-to-build-concrete-patio.html
Posted by: ferraridawas1952.blogspot.com
0 Response to "How To Install A Cement Patio"
Post a Comment